A zipper is easy to stitch into a pillow cover. If you prefer to make an envelope back pillow. Such as the one applied to the Two Hearts Tweeting as one pillow, https://www.embroiderydesigns.com/emb_learning/project/1309/two-hearts-tweeting-as-one-pillow , purchase an extra ½ yard of fabric.
Step 1:
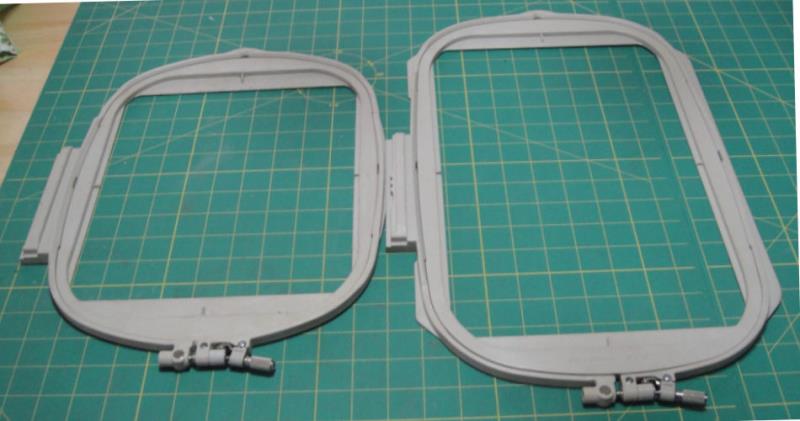
There are two different minimum hoop sizes that will work with this design. The one on the left is an 8” x 8” hoop the one on the right is an 8” x 12” hoop. You will want to cut the fabric and knit interfacing for the front of this pillow so that it will fill your hoop, it will be cut to size for the pillow after the embroidery.
(Click Image to Enlarge)
Step 2:
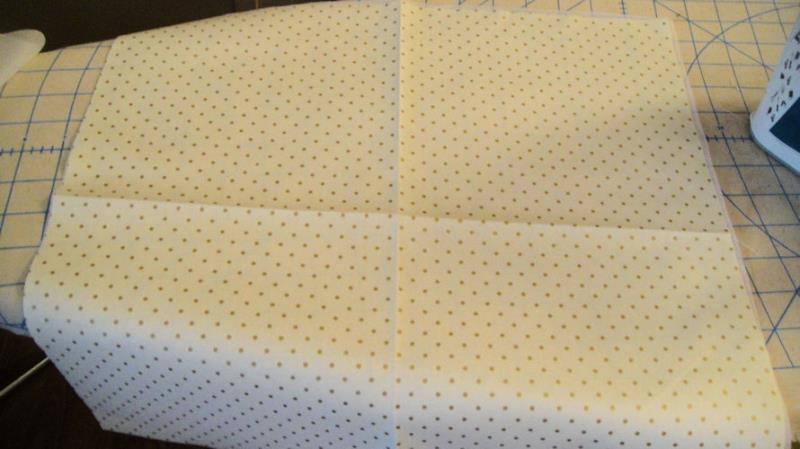
Cut your fabric and knit interfacing to fit your hoop, the sample was cut at 16” x 16” for the 8” x 8” hoop. It would have been cut at 21” x 16” for the 8” x 12” hoop. Cut a 14” square of the fabric and knit interfacing for the back of the pillow. Fuse the knit interfacing to the front and back fabrics. Fold and press the front fabric vertically and horizontally to crease lines to follow for hooping and stitching in the center of the front fabric.
(Click Image to Enlarge)
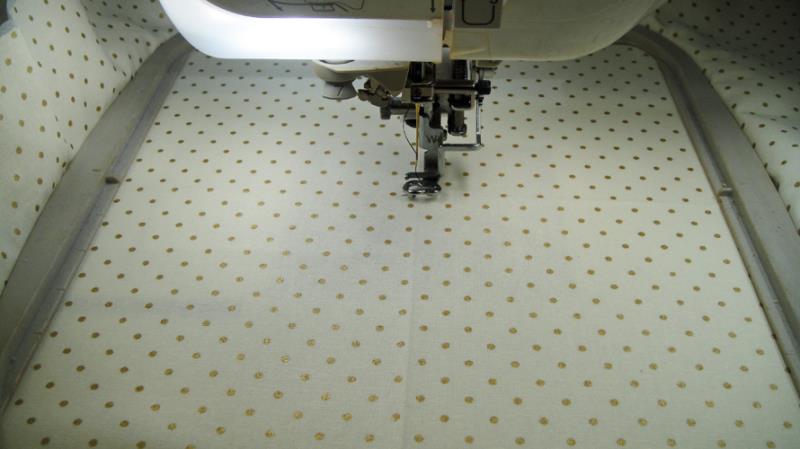
Step 3:
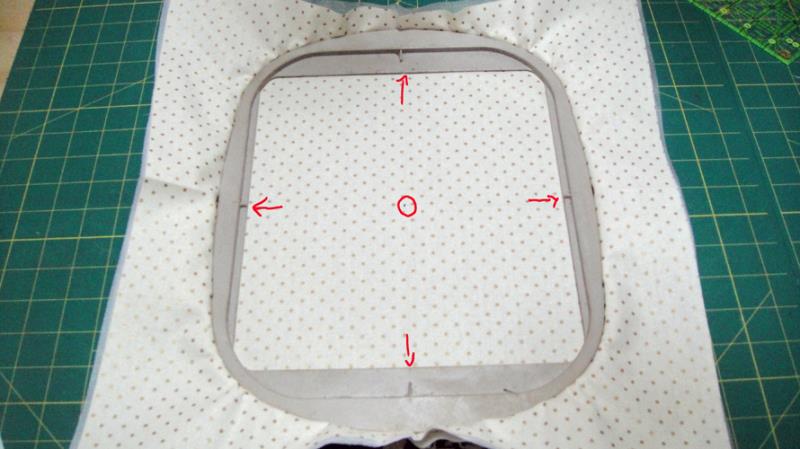
Use the creases you ironed into the fabric to center the fabric in the hoop. Hoop the prepared fabric and no show interfacing tautly.
(Click Image to Enlarge)
Step 4:
Place the hoop into the machine and align the needle over the center point of the fabric creases.
(Click Image to Enlarge)
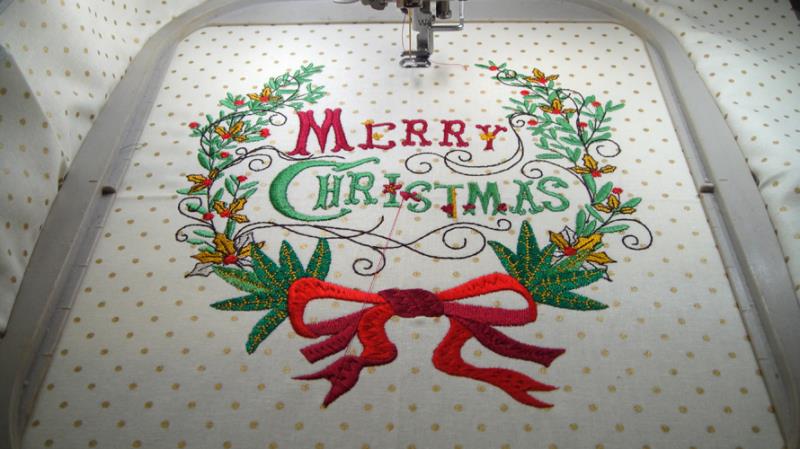
Step 5:
Follow the color chart to embroider the design.
(Click Image to Enlarge)
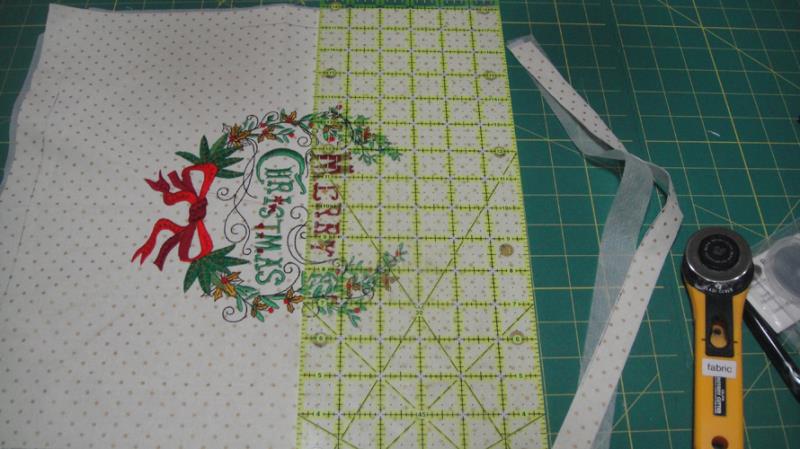
Step 6:
To make it easier to trim the pillow front down to size I used a quilting square ruler to measure out 7” from the center of the design to mark lines for cutting. The center of the design is at the bottom of the left hand loop of the bow on the middle S in Christmas. Draw lines with the Frixion pen to mark out your 14” square before trimming. Trim the pillow front to 14” square.
(Click Image to Enlarge)
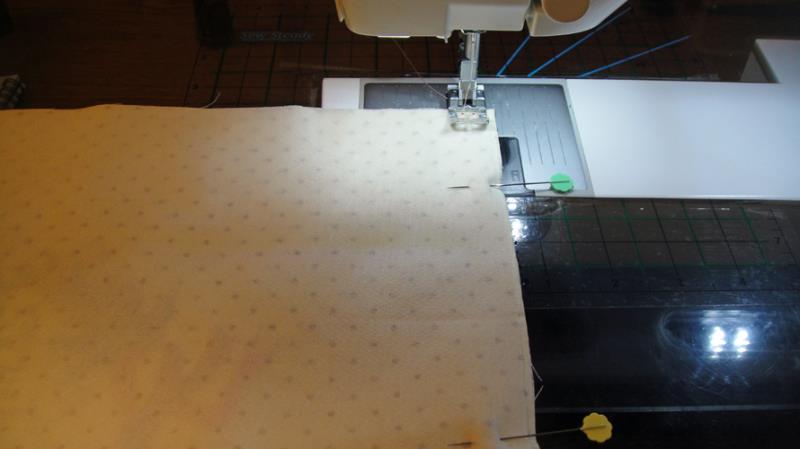
Step 7:
Pin the bottom edges of the pillow front and back to each other right sides together. Set your sewing machine to a stitch length of 4mm or more and stitch the pillow bottom edges together with a ½” seam allowance.
(Click Image to Enlarge)
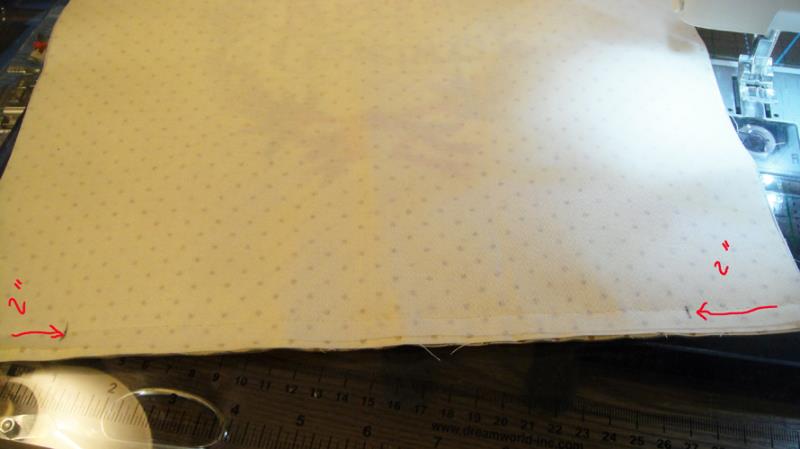
Step 8:
Make a mark 2” in from the outside edges on each end of seam just stitched. Change your stitch length back to a normal stitch length. Stitch over these two 2” sections with the regular stitch length backstitching at the beginning and end of those 2” sections. Press the seam open.
(Click Image to Enlarge)
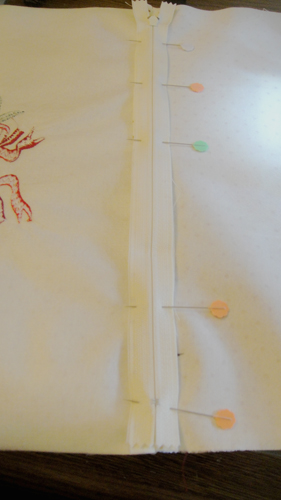
Step 9:
(Click Image to Enlarge)
Pin the zipper face down over the seam.
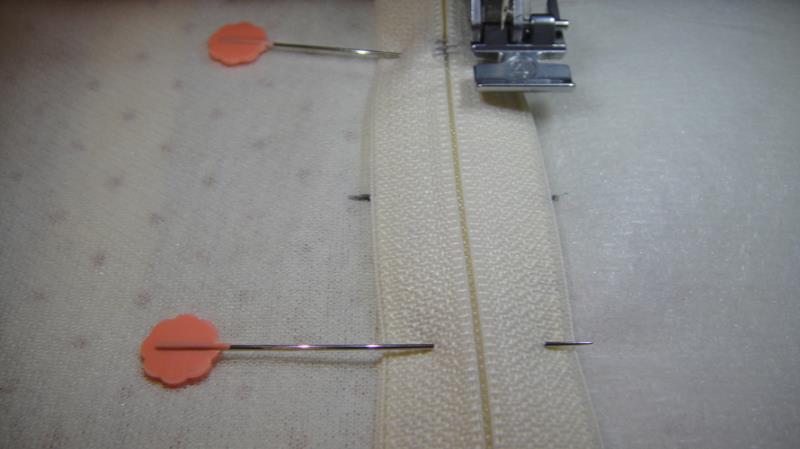
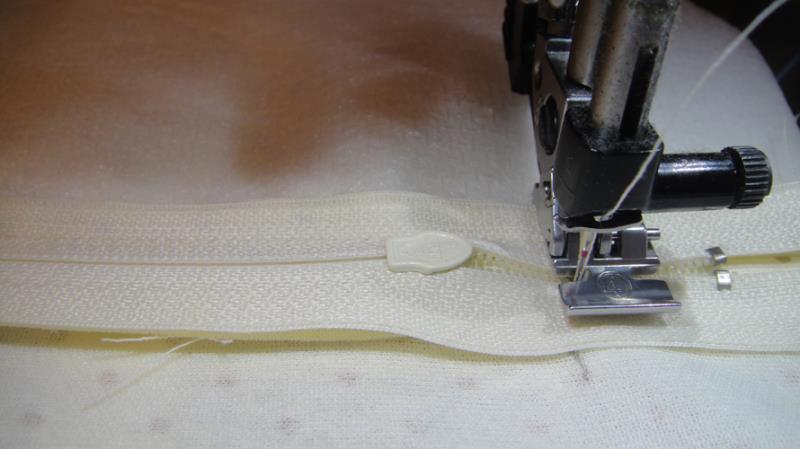
Step 10:
Zipper feet look different on all machines, put your zipper foot on so the needle is on the left hand side of the zipper foot. Starting at the lower edge of the zipper stitch the zipper tape through the zipper the seam allowance and the pillow cover. Remove your pins as you go, do not stitch over pins.
(Click Image to Enlarge)
Step 11:
When you get close to the zipper pull, pull the zipper down into an area you have already stitched so that you can continue stitching straight down the zipper tape.
(Click Image to Enlarge)
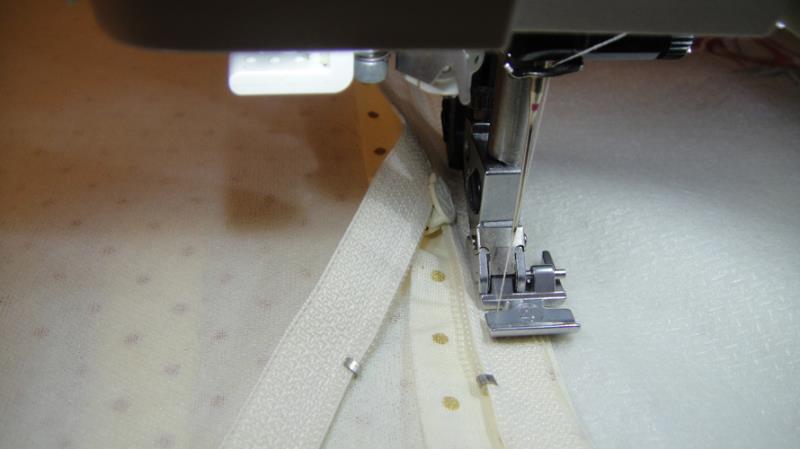
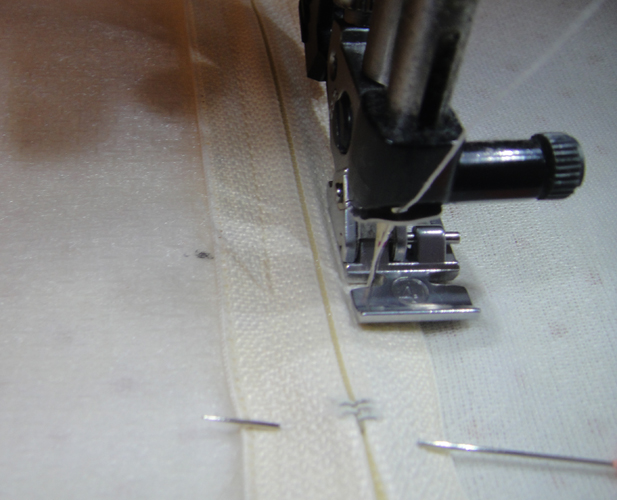
Step 12:
Stop and pivot when you reach the mark where you sewed the regular stitch seam. Back stitch and come forward again over the top of the zipper.
(Click Image to Enlarge)
Step 13:
Continue stitching down the other side of the zipper until you reach the other 2” mark. Have the pull of the zipper up so that you can use the tip of your seam ripper to help move the zipper up and down as necessary to get a straight seam down the second side. Pivot and stitch right across the zipper to the first zipper seam and back stitch to secure this bottom seam.
(Click Image to Enlarge)
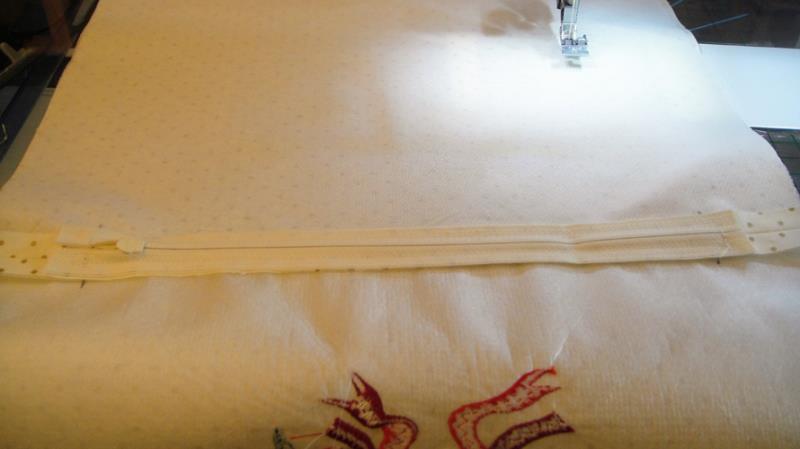
Step 14:
Trim off the excess zipper tape at the top and bottom of the zipper.
(Click Image to Enlarge)
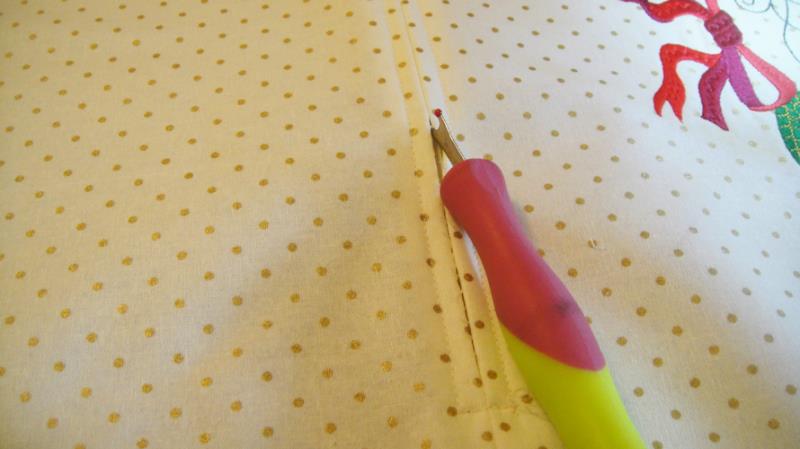
Step 15:
Use your seam ripper to open up the basting stitches. Open the zipper about half way.
(Click Image to Enlarge)
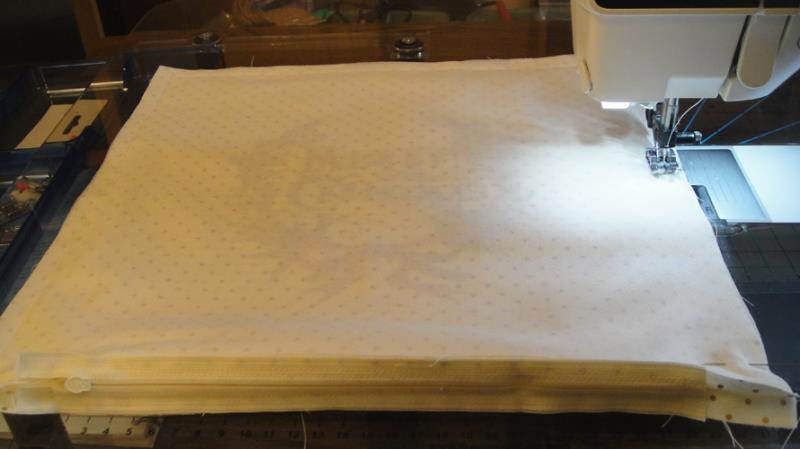
Step 16:
Pin the pillow covers three open sides right sides together. Change back to your regular sewing foot. Stitch around the three sides with a ½” seam pivoting at the corners.
(Click Image to Enlarge)
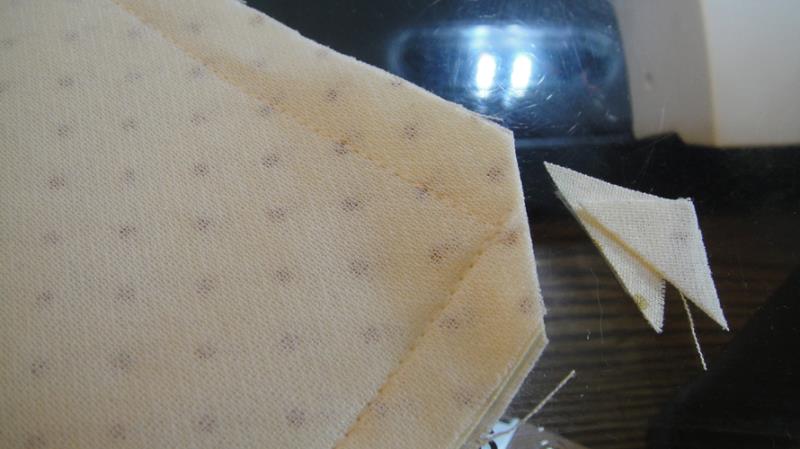
Step 17:
Trim all 4 corners.
(Click Image to Enlarge)
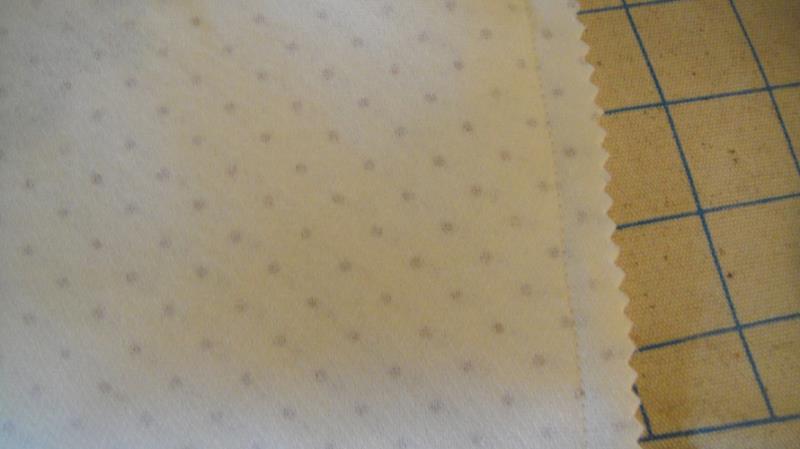
Step 18:
Slightly trim the seam with pinking shears if desired.
(Click Image to Enlarge)
Step 19:
Turn the pillow right side out through the zipper use a point turner to poke out the corners. Press the pillow cover.
(Click Image to Enlarge)
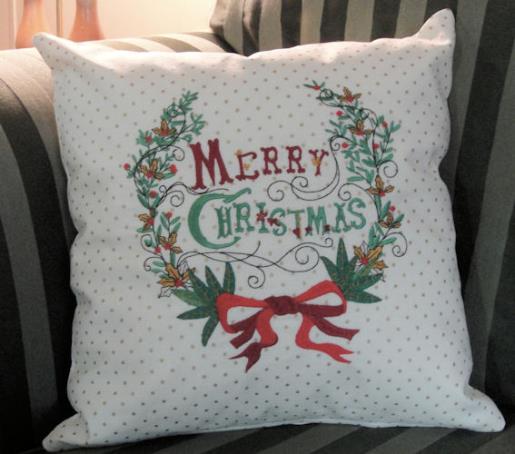
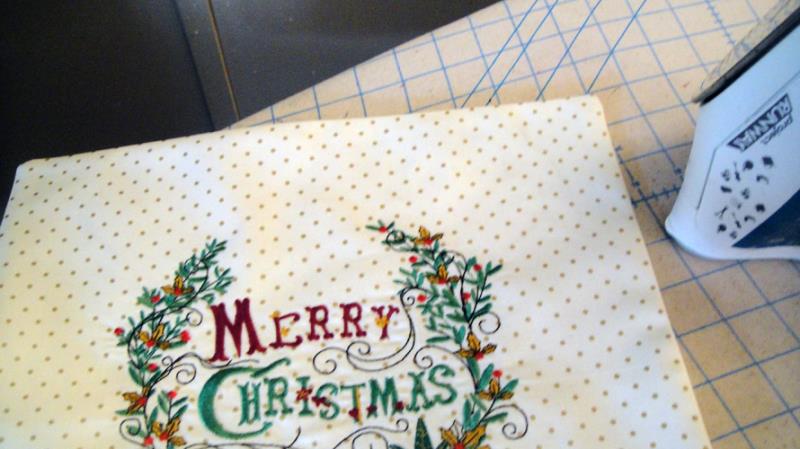
Step 20:
Insert the pillow form. Congratulations your Merry Christmas Pillow is complete!
Award winning Digitizer, Embroidery Educator, Author and a Consultant to the Industry, Pat Williams has 30 years of experience in the embroidery industry. Pat has won multiple awards for her digitizing expertise including the 2007 Impressions Awards Grand Championship, Best of Show as well as the 1st and 2nd Place Awards. Pat’s love of digitizing has afforded her the opportunity to write numerous articles for Impressions magazine in the United States and Images Magazine in Europe. In 2001 Pat was named “Embroidery Educator of the Year.” For many years Pat taught digitizing seminars at the ISS Shows in Long Beach, CA and for Compucon software. She now resides in Tucson, AZ.